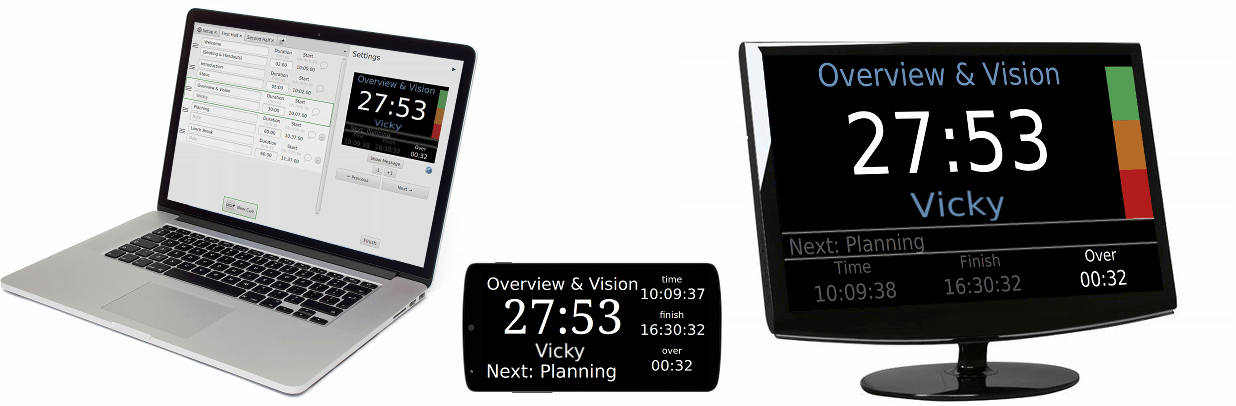
Run the software from a desktop or laptop, and view it on an external monitor, tablet, smartphone, the computer you’re running it on, or all at once.
View your timer on your devices via our simple web viewer.
How It Works
1. Set Up Your Timer
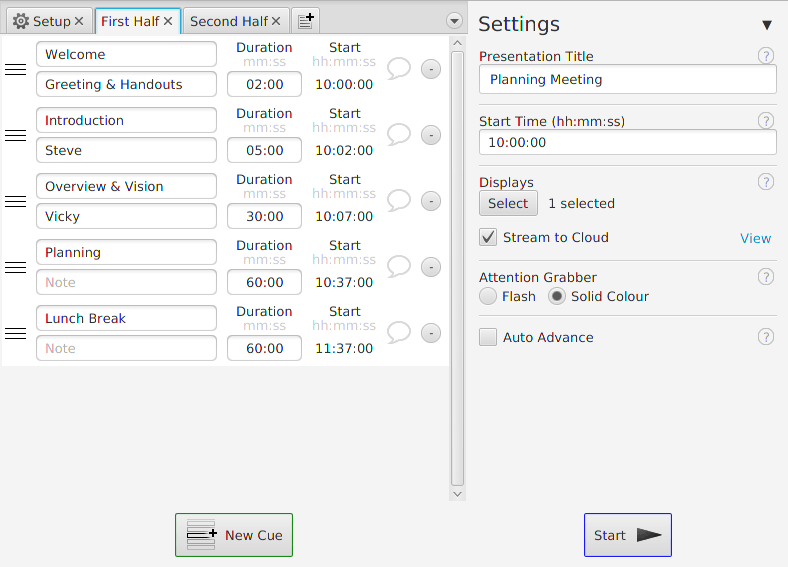 Create cues for each section of your presentation or event. Set the intended start time of your presentation, so you know if you’re running on time or not. Choose where to display the timer and you’re ready to go.
2. Run The Show
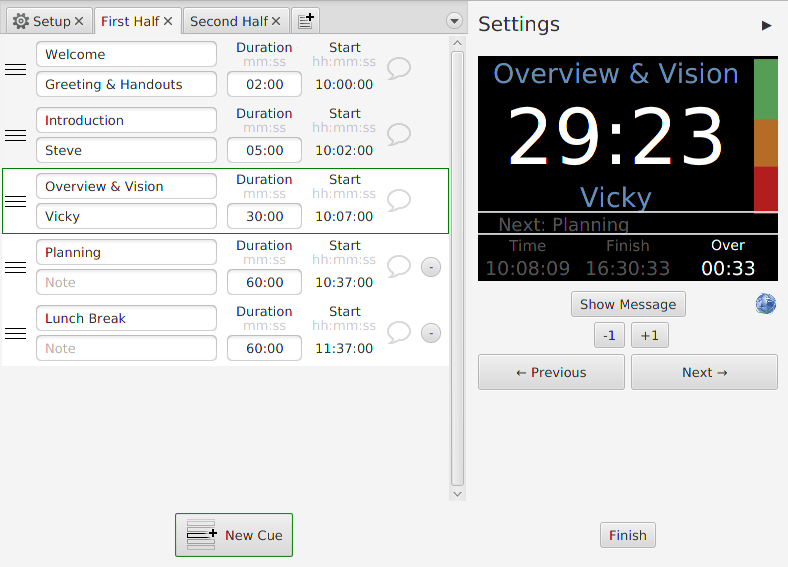 Hit the start button to run the show. If you have selected “Auto Advance”, then all you need to do is keep in time with the timer. If you need more control over the timings, such as if you work in a control booth, then you can decide when to move forwards (or backwards), rearrange cues, add or remove time, and show important messages to the speaker. At this point you can also view and share the link to the web viewer if you are streaming through the Presentation Timer cloud.
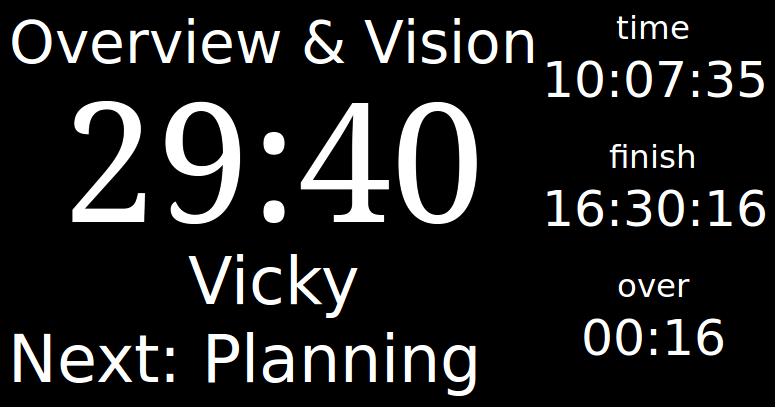
3. Keep In Time
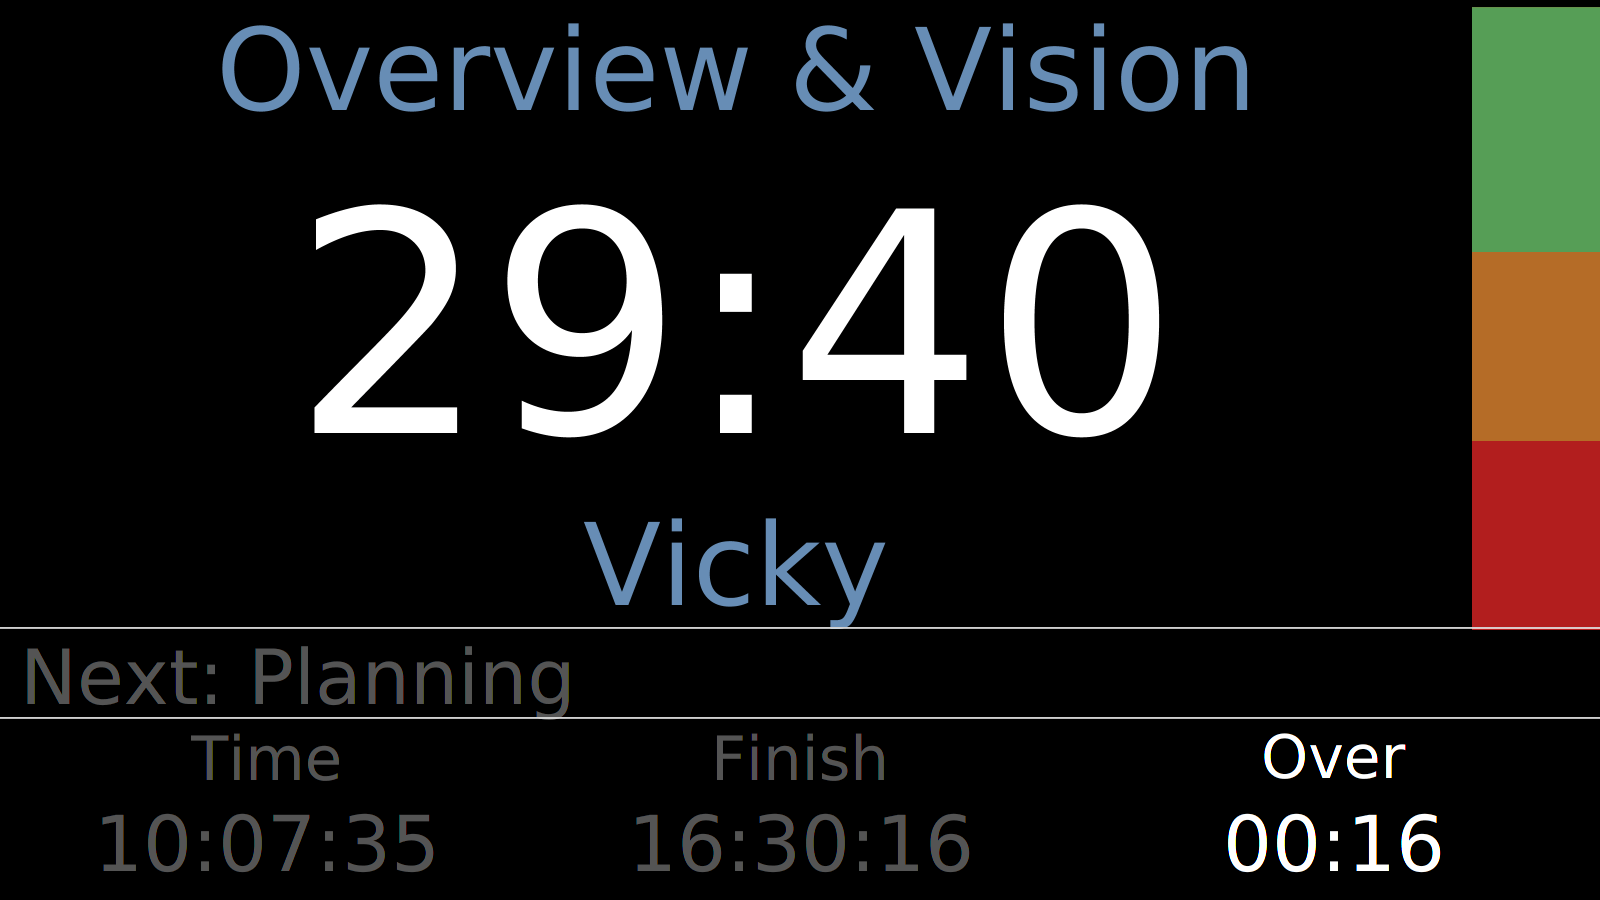 This is where the magic happens. Get a clear understanding of how much time each section has left. See when the presentation or event is likely to finish and whether you are running under or over. Quickly glance at what is coming up next. Using these metrics you can make sure you stay on track. If things do start running over then you can still finish on time.
4. Let Everybody Else Know
 If you decide to stream your timer through the Presentation Timer cloud, then you can get a link to view your timer. This timer can be viewed on screens of all shapes and sizes. You could try sharing the link with your meeting attendees so everyone can keep track of time. Give the link to your stage manager so they know what is coming up next. Send the link to the conference organiser so they know when to move things along.